Crochet: Long Drawstring Pouch
Creator: Suiforest
COPYRIGHT NOTICE
This pattern is for personal use only. It is strictly prohibited to copy, translate, distribute, or resell this pattern and the contents of this document without authorization.
You may sell your finished product(s) as long as you use your own pictures and credit “Suiforest: <Insert pattern link>” for the pattern.

About
This crochet project is made up of mostly double crochet patterns as they are easy to work up in length. I have also not seen many pouches made using double crochet patterns so I decided to make my own.
It is made of alternating colours which are useful if you are running out of yarns (which was the case for me).
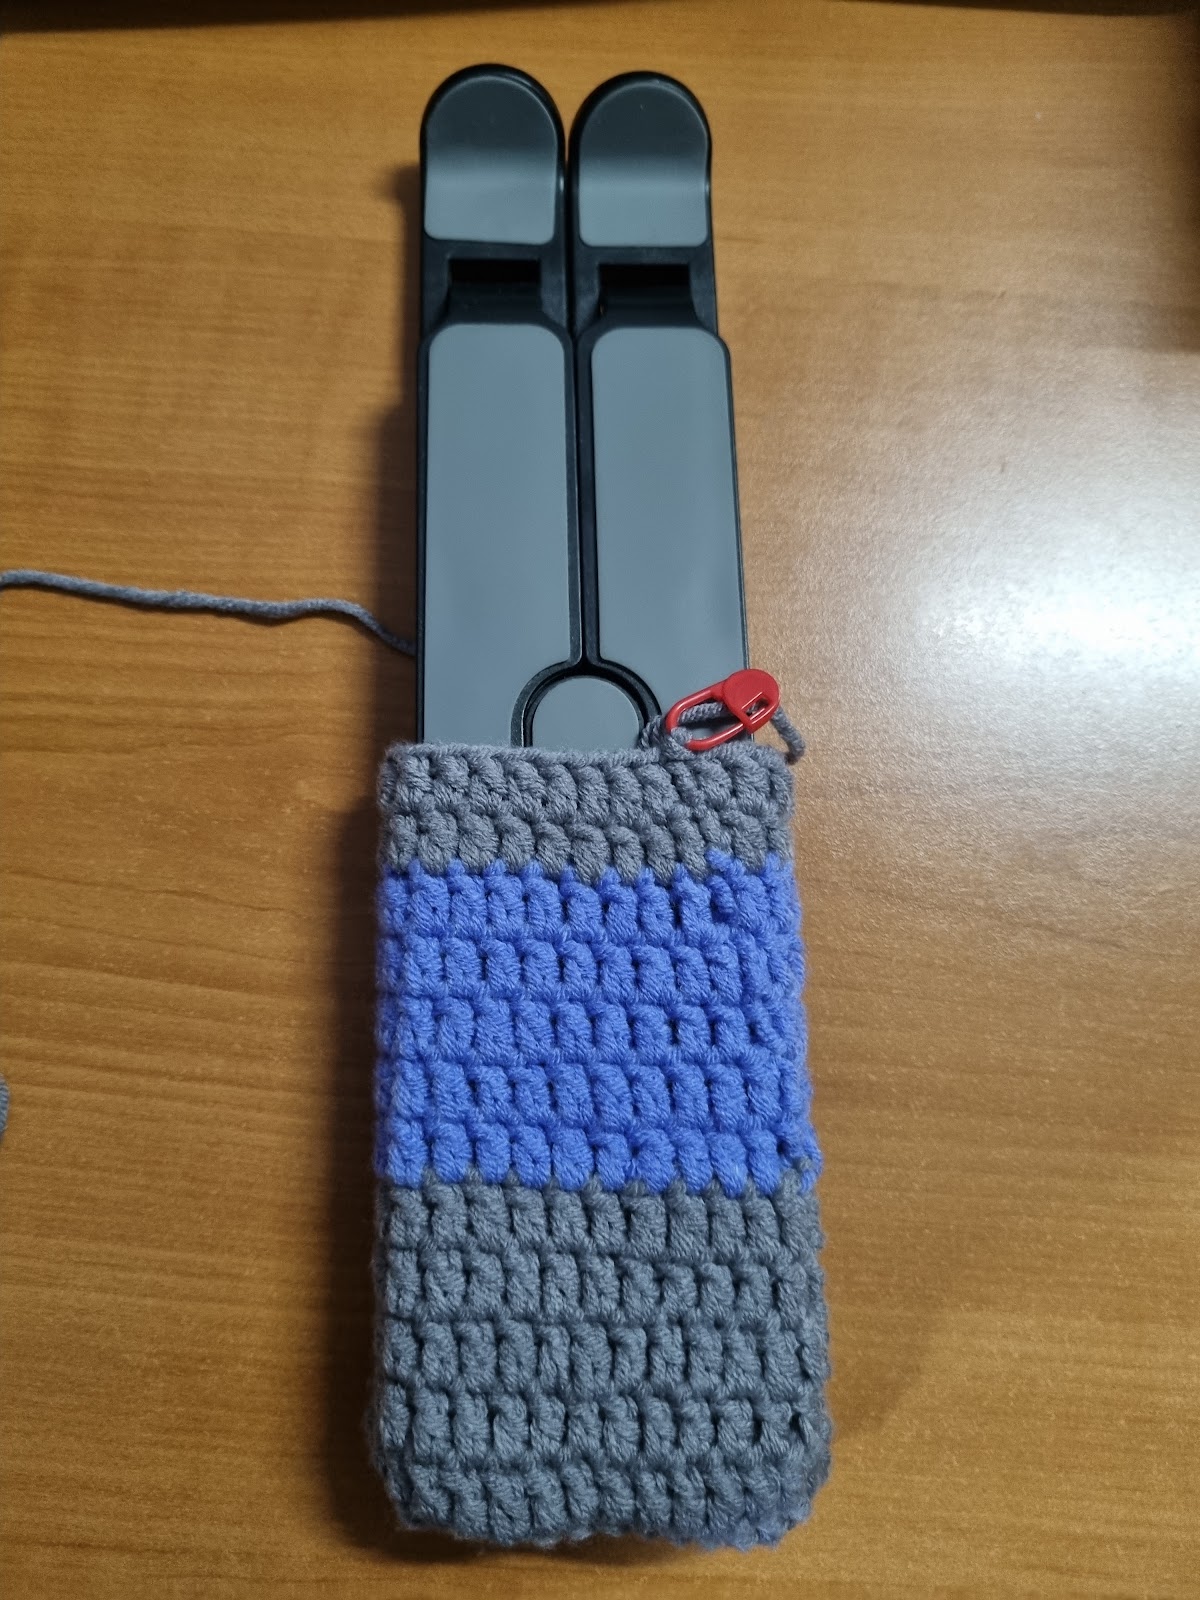
This long drawstring pouch was created to replace the old pouch for my laptop stand, but you are free to adjust the measurements to store any desired items!
Measurements
Laptop Stand
Height: 26.5 cm
Width: 6 cm
Drawstring Pouch
Height: 31 cm
Width: 8.5 cm
Materials Used
4 mm crochet hook
Yarn needle
Less than 50g 4-ply milk cotton yarn - blue
Less than 50g 4-ply milk cotton yarn - grey
US Terms
ch - chain
sl st - slip stitch
sc - single crochet
dc - double crochet
hdc - half double crochet
Steps
Base of Pouch
Make a foundation chain of your desired width
ch3
dc into 4th stitch
dc into every stitch until one last stitch left
3dc into last stitch (rotate your work as you dc)
dc into every stitch
sl st into the outer loop of the first stitch to join the round
Body of Pouch
Round A
ch2
dc into the same sl st
dc into next stitch, repeat for every stitch
sl st into the first stitch to join the round
Round B
ch2
dc into the next stitch, repeat for every stitch
dc into the middle between the last stitch and the slip stitch (to make up for the first missing dc)
sl st into the first stitch to join the round
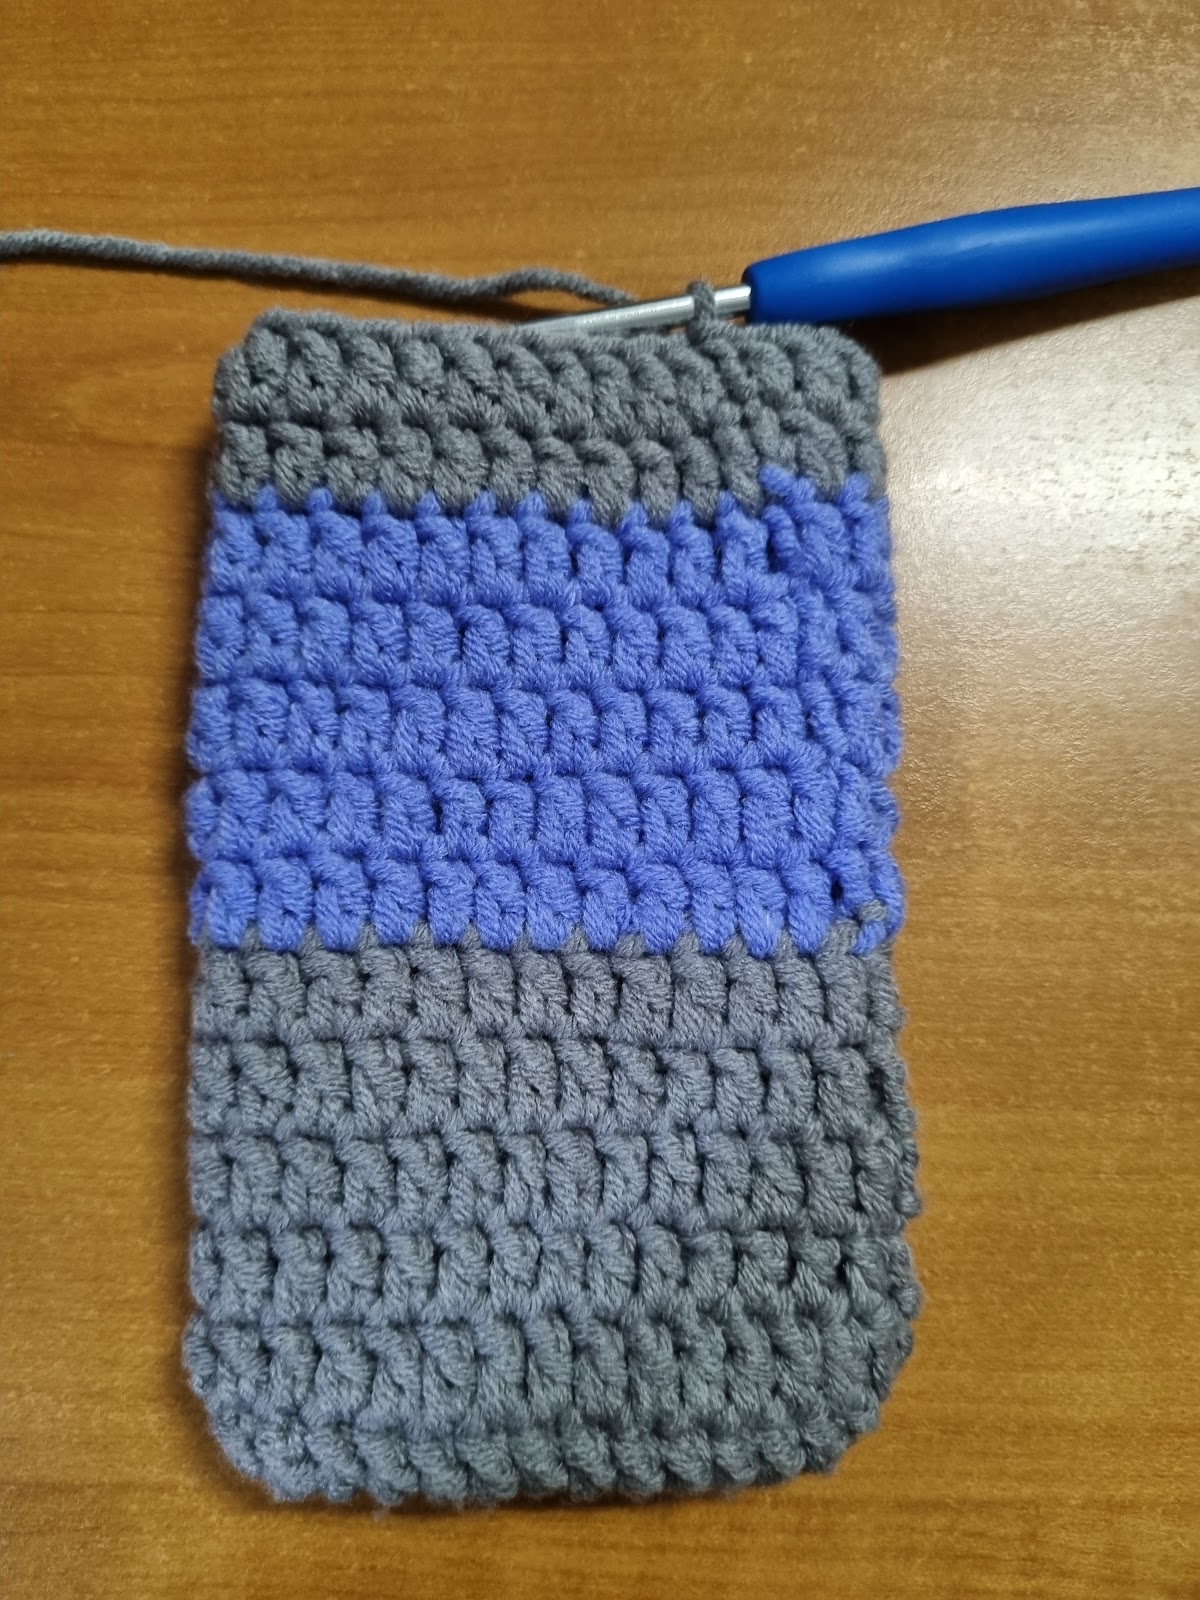
Repeat Round A and Round B until you reach about 4 cm away from the desired height.
Change colour after every 5 rounds.
Progress after 12 rounds
Drawstring Area
Repeat Round A and Round B to add another 2 rounds.
Round C
ch1
sc into the same slip stitch
sc into next stitch, repeat for every stitch
sl st into the first stitch to join the round
Round D (forming the gaps for the drawstring)
ch1
hdc into the same slip stitch
ch1, skip 1 stitch, hdc into next stitch (repeat until you reach the end of the round)
sl st into the first stitch to join the round
Frills
Round E
sl st into first gap, ch1, 5hdc into the same gap
sl st into next gap, 5hdc into the same gap (repeat for every gap)
sl st into the first stitch to join the round
Drawstrings
Make 2 foundation chains, each twice as long as the width of the pouch. These will be your drawstrings.
Use a yarn needle to guide the first drawstring into each gap, alternating in and out each gap.
Guide the second drawstring into the same gaps as the first drawstring.
For each drawstring, tie the ends together.
Congratulations, you have completed your crochet project!


Comments
Post a Comment