Crochet: Scrunched Ribbed Baby Hat
Creator: Suiforest
COPYRIGHT NOTICE
This pattern is for personal use only. It is strictly prohibited to copy, translate, distribute, or resell this pattern and the contents of this document without authorization.
You may sell your finished product(s) as long as you use your own pictures and credit “Suiforest: <Insert pattern link>” for the pattern.
If you are aware of anyone violating the above terms, please report and inform the creator at suitriescrochet@gmail.com. Thank you.

About
This crochet project is made entirely in one piece. It starts with a circle, followed by the ribbed rows and finally ending with the hat flares. The pattern will include stitch counts for the circle and ribbed rows. It will also include step-by-step pictures for the more complex parts as well as instructions on how to make the hat bigger. Have fun!
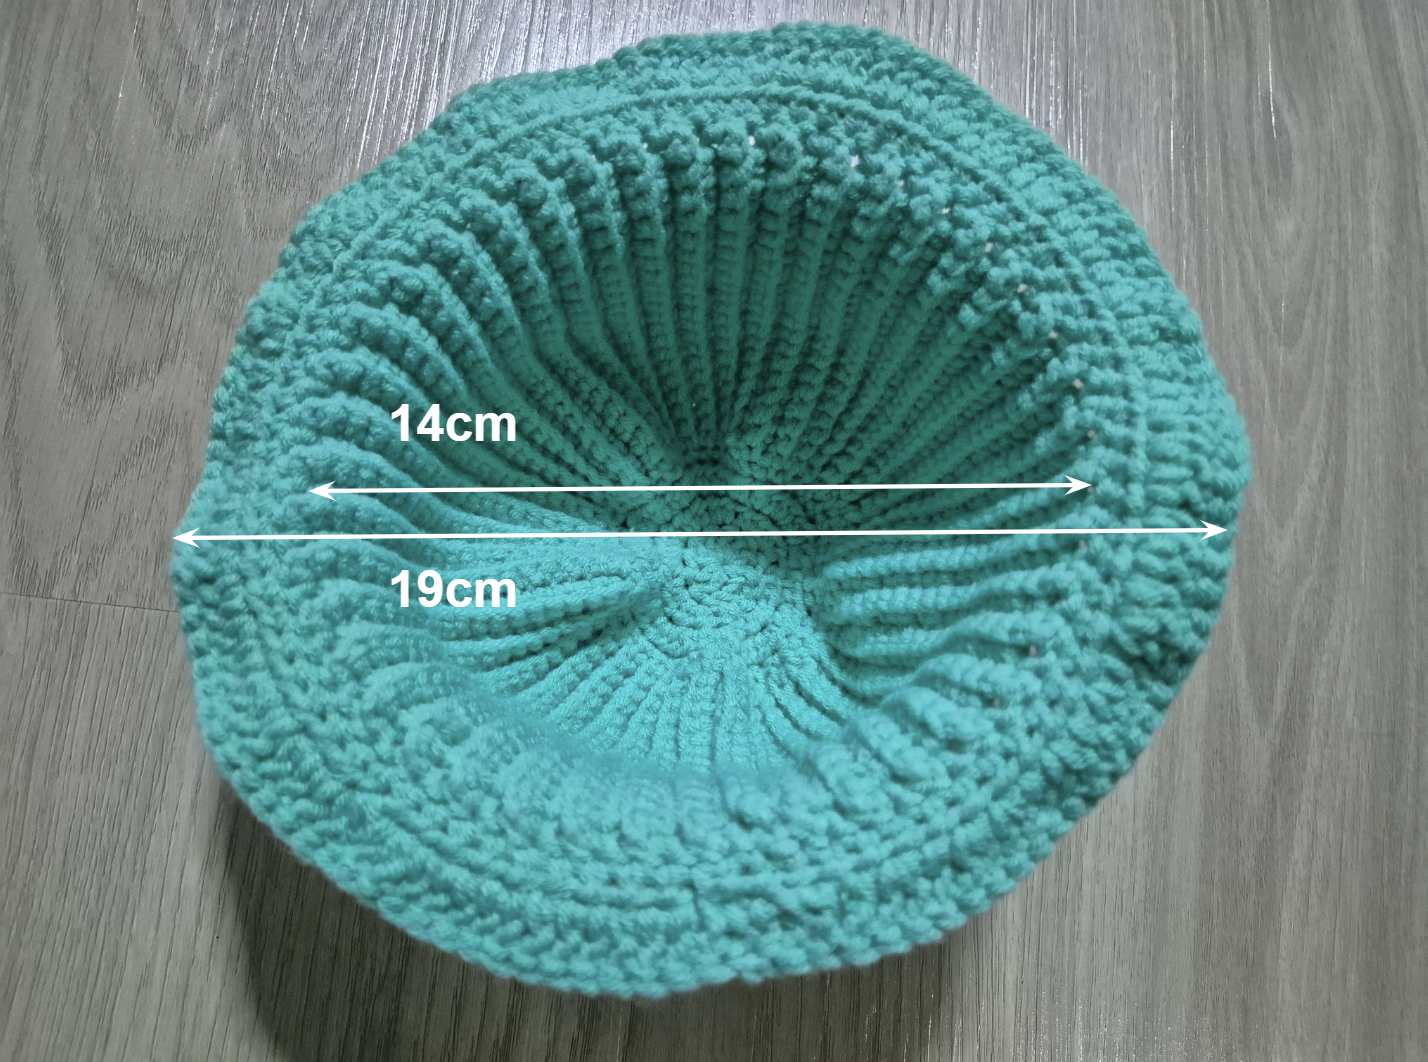
Measurements
Hat
Height: 12cm
End-to-end width: 19 cm
Head width: 14cm

Materials Used
4 mm crochet hook
Yarn needle
4-ply milk cotton yarn - 50g, green
US Terms
ch - chain
sl st - slip stitch
sc - single crochet
dc - double crochet
hdc - half double crochet
blsc - backloop single crochet
Steps
Top of the hat
R1:
Do a magic ring
ch 2
11 dc [12 stitches]
Pull the magic ring to close up
sl st into beginning stitch to join the round
 |
| After 11dc |
R2:
ch1
hdc into same stitch
2hdc into every stitch
sl st into beginning stitch to join the round
[21 stitches]
 |
| End of R2 |
R3:
ch1
2hdc into same stitch
2hdc into every stitch
sl st into beginning stitch to join the round
[42 stitches]
Diameter: 6cm
 |
| End of R3 |
At this point, if you want to make the hat bigger, you can create more rounds by doing an increase (2hdc into every stitch) until you reach your desired diameter size.
Note that the bigger the circle, the more rows you will have to crochet in the next part.
Ribbed body
R4:
ch21 (if you want a taller hat, add more chains)
Skip first stitch, sc into every stitch [20 stitches]
sl st into the next stitch of the circle to secure the long row to the circle
 |
| After 20sc |
 |
| sl st into the space where the red needle is pointing at. |
 |
| End of R4 after sl st |
For R5 and R6, you will be crocheting into the 20 stitches row that you have created in R4.
R5 (moving away from the circle):
Do not ch1, the slip stitch in R4 has contributed to the stitch count
Turn your work
Skip first stitch, blsc into every stitch of the row until the end [20 stitches]
R6 (moving towards the circle):
ch1
Turn your work
Skip first stitch, blsc into every stitch of the row until the end [20 stitches]
sl st into the next stitch of the circle to secure the long row to the circle (same as R4 Step 3 image)
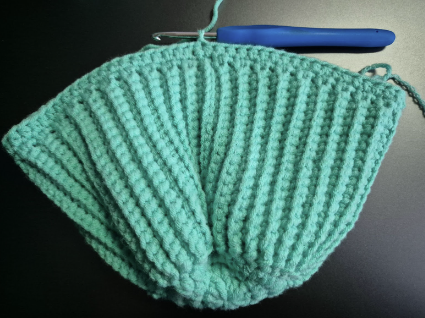
Repeat R5 and R6 until you enclose the circle.
No row or stitch counts given after this point.
 |
| Progress after a few rows |
 |
| Progress with one stitch left |
 |
| Close-up |
As before, slip stitch into that last remaining space where the red needle is at. Finish the very last R5 and R6.
 |
| After finishing the last row |
 |
| Close-up |
Joining the first and last row
sl st into the space where the red needle is at
Align your work such that the first row and the last row are side by side
Make sure the right side of the circle is facing out
Insert your hook into the outer loops to sl st join the rows together
sl st join the rows for every stitch until the rows are completely joined
 |
| sl st into the space where the red needle is at |
 |
| After sl st |
 |
| Align your work |
 |
| Insert your hook into the outer loops as shown by the red needle |
 |
| Progress after sl st join a few stitches |
 |
| Completely joined rows |
This is how your entire work should look at this point in time.
 |
| Wrong side of hat |
 |
| Right side of hat |
Flare of the hat
R1:
ch1
sc into the edge of the rows (refer to the pictures for which space to sc)
sl st to join the round
 |
| After ch1 |
 |
| sc into that space where the red needle is at |
 |
| after your very first sc, the next space to sc is where the red needle is at |
R2:
ch1
hdc into every stitch
sl st to join the round
 |
| End of R2 |
R3:
ch2
1dc into next stitch
2dc into next stitch
Repeat Steps 2 and 3 until the end of the round (Note: it does not matter if you do not have the even number of stitches, just finish with the 1dc if you have to.)
sl st to join the round
ch1 fasten off
Weave in all the ends.
 |
| End of R3 |
 |
| Outside of hat |
 |
| Inside of hat |
Congratulations, you have completed your crochet project!


Comments
Post a Comment